If you're looking at different ways to reduce your waste and give a second life to some paper pieces, making your own paper may be for you!
What you'll need:
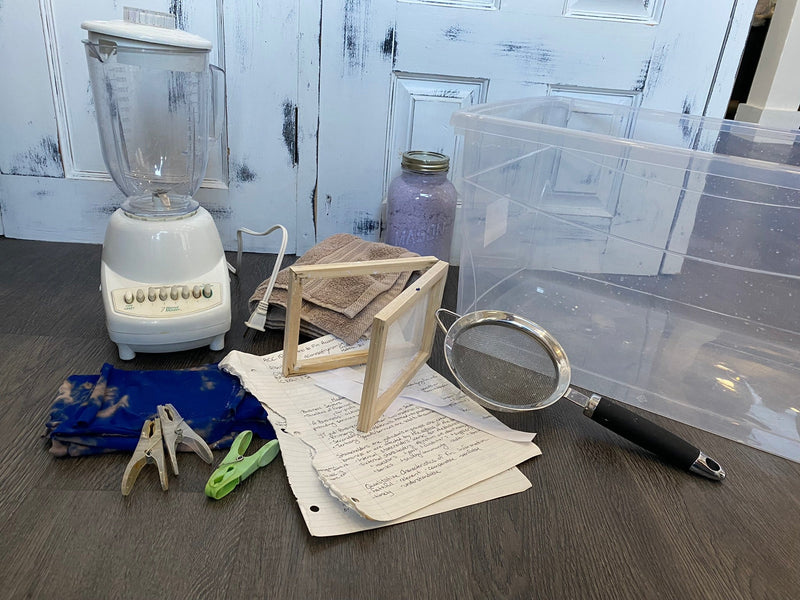
- Paper (any size, shape, or colour will work)
- Mould + Deckle (a wooden frame with mesh)
- An absorbent towel or sponge
- A plastic tote bin
- A blender (not recommended to use one that you also use food in, I found mine at Goodwill for $5)
- Fabric squares
Optional:
- A fine strainer and a mason jar (if you want to save some paper pulp for later)
Most of these items I already owned aside from a blender and mould and deckle, so overall I spent around $20 for this activity.
To start I ripped up all of my paper scraps into about 1" squares and put them into the plastic tote bin and covered them with water, leaving them to soak overnight. If you use any thicker paper you may want to soak a little longer until they are soft.
Next, you will take about 2 handfuls of wet paper scraps and add them to the blender, and fill the blender with water. Blend until there are no chunks in your pulp.
You can add this pulp into the water left over from soaking your paper scraps to reduce your water waste. Alternatively you can strain this pulp from the blender and add it to your mason jar to use at a later date.
Once you have blended all your paper scraps and added the pulp to the tote, grab your mould and deckle. Make sure to swirl your hand around the water to make sure the pulp is not all settled on the bottom. Dip your mould and deckle into the pulp water on an angle and try to evenly distribute the pulp so your paper is even. If you mess up this step, it is okay, just use your hand to scrape the pulp off the mould and deckle back into the water and try again!
Let water drain out of the mould and deckle until it barely drips anymore. Open the mould and deckle to let even more water drain out.
Flip your mould and deckle onto your pre-cut fabric squares and use your towel or sponge to press the back of the mesh to remove excess water. Gently lift your mould and deckle up to release the paper onto the fabric.
Hang your paper up to dry. This will take several hours depending on the thickness of your paper (I left mine overnight).
Once completely dry, lift a small edge of the paper from the fabric backing and peel the fabric completely off - this part is the most satisfying in my opinion.
If you like the paper as it is, you're all done! Additionally you can stack the paper under a heavy object (like a book) for several hours to help flatten it.
Overall this was a low-cost weekend activity that made me appreciate paper a lot more, but I love the unique look of the paper I made. I would say it took me about 3 hours of work total to make 40 sheets of paper (with enough left over pulp to make 40 more). I think going forward it would take me less time now that I have the hang of it!


0 comments